Windows .NET Development on Mac OSX

I use Windows at work so for some variety I have moved to a Mac at home. The 2010 Mac Mini is a decent little machine with the RAM upgraded to 4GB.
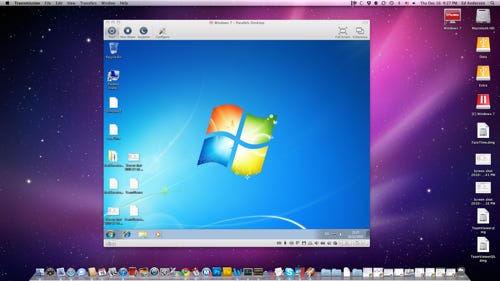
For Windows development you need Visual Studio, which means running Windows on your Mac. Bootcamp is one way of doing this, but then you lose all the benefits of OSX as your host OS. The secret is of course Parallels Desktop which allows you to run Windows virtualized on your Mac.
Using Parallels Desktop for Windows Development
It took a couple of tries to get this working decently.
- Install Parallels Desktop
- Get a Windows 7 32bit ISO image from MSDN (or a retail copy of course)
- Set up a new Virtual Machine, specifying your Windows 7 ISO to install from

- Select “Like a Mac” so the application integration gets automatically set up
- IMPORTANT: For best performance, place the virtual machine on a separate drive. I get good results with an external USB2.0 Hard Drive but Mac Pro owners can put this on an internal disk. The built in hard disk of the Mac Mini is only 5400rpm which will be a real bottleneck when running OSX and Windows off the same disk. (You can of course use Parallels to run Windows off your Bootcamp partition – this will be slow too if the partition is on the same physical disk as OSX).
- Allow Parallels to install Windows automatically. It will select the default settings during installation and input your product key. You will eventually end up with a nice Windows 7 desktop inside a Parallels window.
- Parallels will automatically map your Desktop, Documents, Pictures, Music and Download folders to Windows’s equivalents, meaning you will see the same files on the Mac and Windows desktops.
- Install Visual Studio 2010. You can mount the ISO in the Parallels Virtual Machine settings. A couple of restarts (of the VM) later and it is installed.
- You will notice that running applications in the Windows VM show up in the Dock. You can even right click and pin the applications to the Dock. Parallels will start the virtual machine and launch the application.
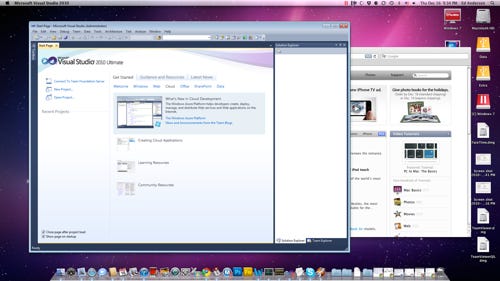
- Click the Coherence button in Parallels and Windows will be integrated with OSX. Launching Visual Studio 2010 from your pinned dock icon will give you Visual Studio 2010 with the same appearance and window behaviour as a standard Mac app:
- You are now ready to develop Windows applications from OSX. Parallels has GPU acceleration so even WPF applications are not too bad.
Advanced Tips
- Give the Windows 7 Virtual Machine enough RAM, but not enough that OSX will start paging. With 4GB of RAM, you can afford to give the VM 1GB. Remember: you are only going to run Visual Studio on Windows 7. All your other apps; browsers, Photoshop, Skype etc, will run in OSX.
- Activate the “Pause Windows when no applications are open” setting under Applications in the Windows 7 VM settings. This means that the virtual machine will pause and give the memory back to OSX when no applications are running.
- Be aware that your Documents folder on Windows is now a network drive, with all the security differences this brings. .NET will be strict about this in some cases (I hit this problem when running a custom content processor for XNA, which cannot be loaded from network drives) If you hit security problems, you need to set the \\.psf\ network drive to FullTrust for .NET. Run this command from a command prompt in Windows and restart Visual Studio:
C:\Windows\Microsoft.NET\Framework\v2.0.50727> CasPol.exe -pp off -m -ag 1.2 -url \\.psf\* FullTrust
- Make sure that while you backup your Documents folder and Visual Studio projects with Time Machine, don’t backup the drive that the Windows Virtual Machine hard disk is on or you will run out of backup space very quickly. Parallels also has an option to make sure that this does not happen.


