I’m going to walk through the basics of Form submission with ASP.NET MVC, showing some best practices. This set of tutorials will be useful for developers moving away from ASP.NET WebForms into ASP.NET MVC or even Rails developers curious about how we do things in .NET.
You can download the code for Part 1 at: https://github.com/edandersen/mvcformtutorial/tree/part1
Form submission flow
If you have come from WebForms, you’ll be used to being able to pull form values out in the code behind by simply referencing variables in your code behind. These magically map to elements on the page and most of the time you are blissfully unaware how the data gets there. With MVC, we don’t have the same abstraction. Whereas you can access POSTed variables directly with FormsCollection (or params in Rails) but with the ViewModel pattern, we can simulate the binding that ASP.NET provides and access our form variables in a strongly typed manner.
Starting the project
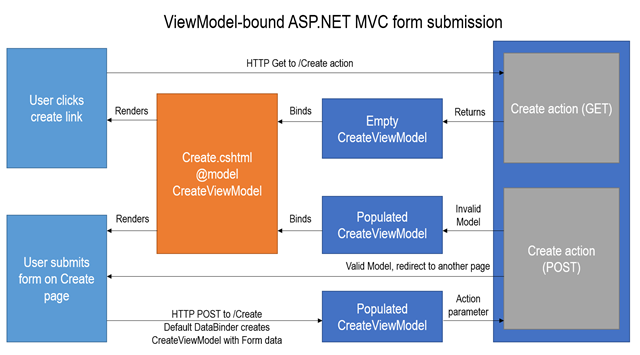
Above is a brief overview of how this pattern works. Starting in the top left, the user accesses the Create action. The Action method provides a new CreateViewModel object to the Create.cshtml view, which renders the Form using the data in the ViewModel. When POSTing the form back to the Controller, the default ASP.NET MVC DataBinder maps the POSTed Form values to Properties on the ViewModel class and provides it as a parameter to the HTTP POST overload of the Create action. Depending on the validity of the model, the POST overload of the Create action returns the same form back to the user (showing the validation errors), or redirects to another page.
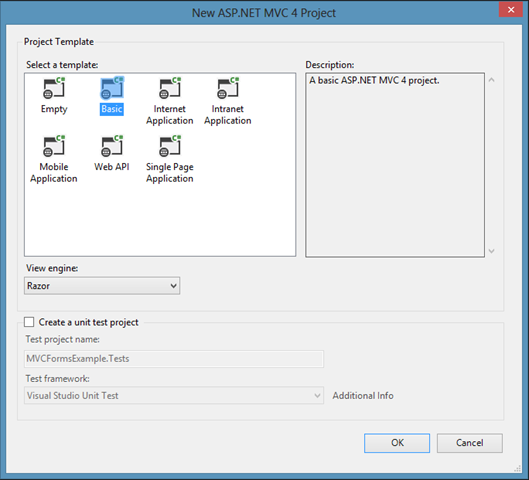
Lets build a simple version of the above flow. First, we create a new “Basic” ASP.NET MVC 4 project in Visual Studio 2012:
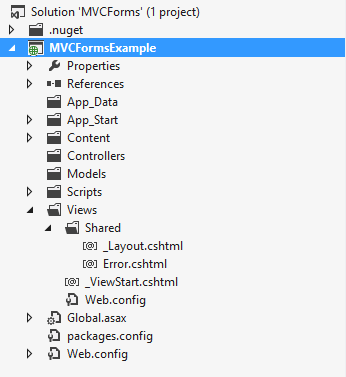
Which gives us an empty project layout:
We need to add some files to this project. Lets first create the ViewModel class under a new folder called “ViewModels” – BookViewModel.cs. We’ll be creating a form for some very simple Book information. The class looks like this:
using System;

namespace MVCFormsExample.ViewModels
{
    public class BookViewModel
    {
        public Guid Id { get; set; }
        public string Name { get; set; }
        public string Author { get; set; }
        public DateTime DatePublished { get; set; }
        public int Rating { get; set; }
    }
}
Note how at this stage, this is a simple POCO class with no business logic. This could be a domain model in the Models folder and map to an ORM directly but for all except the most simple use cases, preparing a ViewModel for presentation purposes works out to be more flexible in the long run and less coupled to your database design, which might be a legacy database.
Next, add a Controller, BookController.cs in the Controllers folder. Following the flowchart above, we create two actions, Index and Create, with a Post overload for the Create action that accepts a BookViewModel parameter. This method must be marked with [HttpPost] to tell the MVC framework to use this for POST requests (otherwise the route would be ambiguous). As above, this checks that the ModelState is Valid, redirects to Index if it is and returns the same ViewModel to the View to render validation errors if not.
using System.Web.Mvc;
using MVCFormsExample.ViewModels;

namespace MVCFormsExample.Controllers
{
    public class BookController : Controller
    {
        public ActionResult Index()
        {
            return View();
        }

        public ActionResult Create()
        {
            return View(new BookViewModel());
        }

        [HttpPost]
        public ActionResult Create(BookViewModel viewModel)
        {
            if (ModelState.IsValid)
            {
                // TODO: Save book
                return RedirectToAction("Index");
            }

            return View(viewModel);
        }
    }
}
Because we don’t have a Home controller, we need to edit our default route to point to the Books controller. Open App_Start/RouteConfig.cs and change the default route to look like this:
routes.MapRoute(
                name: "Default",
                url: "{controller}/{action}/{id}",
                defaults: new { controller = "Book", action = "Index", id = UrlParameter.Optional }
            );
Now we can create our Views. The Index View will now be the default view for when we start our App, which will simply contain a link to the Create page. Create a Books folder under the Views folder and add the file Index.cshtml:
@model dynamic

@{
    ViewBag.Title = "Books";
}

<h2>@ViewBag.Title</h2>

@Html.ActionLink("Create", "Create")
We can also add the initial version of the Create view as Create.cshtml. Note that the model type of the view is our BookViewModel:
@model MVCFormsExample.ViewModels.BookViewModel

@{
    ViewBag.Title = "Create Book";
}

<h2>@ViewBag.Title</h2>
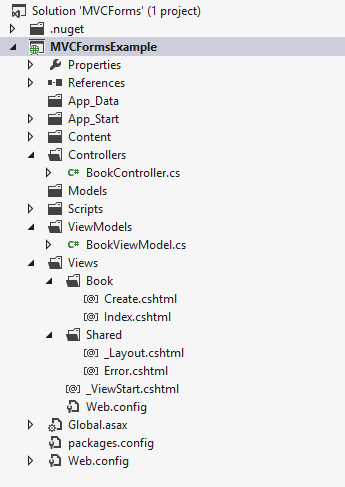
The project should look like this now:
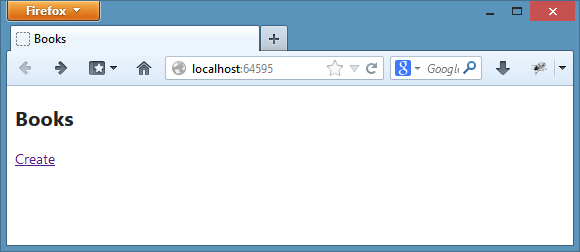
If you run the project, you’ll see the initial Index page load up:
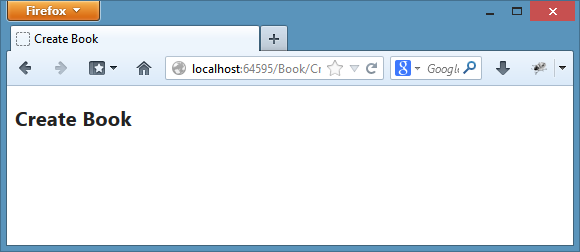
And clicking the link goes to the empty Create page:
Creating the form
On Create.cshtml, we can create Labels, Inputs and Validation messages for each element in the ViewModel. Update Create.cshtml to look like this:
@model MVCFormsExample.ViewModels.BookViewModel

@{
    ViewBag.Title = "Create Book";
}

<h2>@ViewBag.Title</h2>

@using (Html.BeginForm())
{
    @Html.HiddenFor(m => m.Id)

    <div class="editor-label">
        @Html.LabelFor(m => m.Name)
    </div>
    <div class="editor-field">
        @Html.EditorFor(m => m.Name)
        @Html.ValidationMessageFor(m => m.Name)
    </div>
    <div class="editor-label">
        @Html.LabelFor(m => m.Author)
    </div>
    <div class="editor-field">
        @Html.EditorFor(m => m.Author)
        @Html.ValidationMessageFor(m => m.Author)
    </div>
    <div class="editor-label">
        @Html.LabelFor(m => m.DatePublished)
    </div>
    <div class="editor-field">
        @Html.EditorFor(m => m.DatePublished)
        @Html.ValidationMessageFor(m => m.DatePublished)
    </div>
    <div class="editor-label">
        @Html.LabelFor(m => m.Rating)
    </div>
    <div class="editor-field">
        @Html.EditorFor(m => m.Rating)
        @Html.ValidationMessageFor(m => m.Rating)
    </div>

    <button type="submit">Create</button>
}
We start with using Html.BeginForm, which wraps the containing markup in <form> tags. The default HTTP method is POST and the default Action to post to is the same as the current route – in this case Create. For the Id field, we only use the built in Html.HiddenFor helper since we don’t want to display it. For the remaining fields of the BookViewModel, we need to use Html.LabelFor, Html.EditorFor and Html.ValidationMessageFor, including some HTML markup to put each div on it’s own new line (the CSS is included with the “Basic” template). Finally a submit button will POST the form.
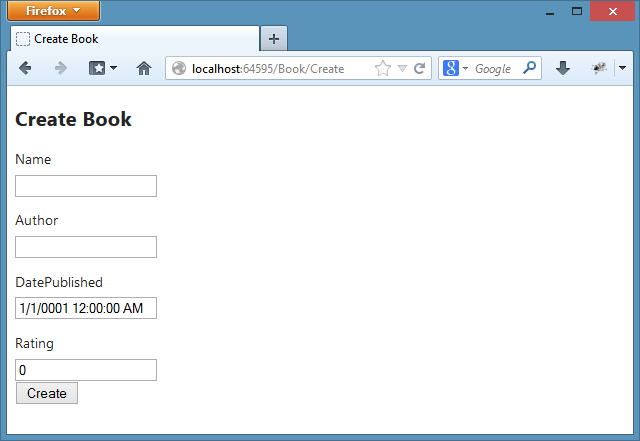
If you now run the project and go to the Create form, it will look like this:
You can also click Create. Because the data on the form is Valid, it will redirect to the Index page. The data is not valid of course, so we need to add some Validation.
The ViewModel should be updated to include some DataAnnotations. These annotations are used by the MVC framework to validate the model data on submission. Lets update the ViewModel, with [Required] attributes on Id, Name, Author, DatePublished, a Range attribute on Rating (between 1 and 5 stars), a Date datatype on DatePublished and Display attributes to override the Label value. We also switch the type of DatePublished from DateTime to Nullable<DateTime>, to prevent the date of “1/1/0001 12:00:00AM” from being the default value:
using System;
using System.ComponentModel.DataAnnotations;

namespace MVCFormsExample.ViewModels
{
    public class BookViewModel
    {
        [Required]
        public Guid Id { get; set; }

        [Required]
        public string Name { get; set; }

        [Required]
        public string Author { get; set; }

        [DataType(DataType.Date)]
        [Required]
        [Display(Name = "Date published")]
        public DateTime? DatePublished { get; set; }

        [Range(1,5)]
        [Display(Name = "Rating (1-5)")]
        public int Rating { get; set; }
    }
}
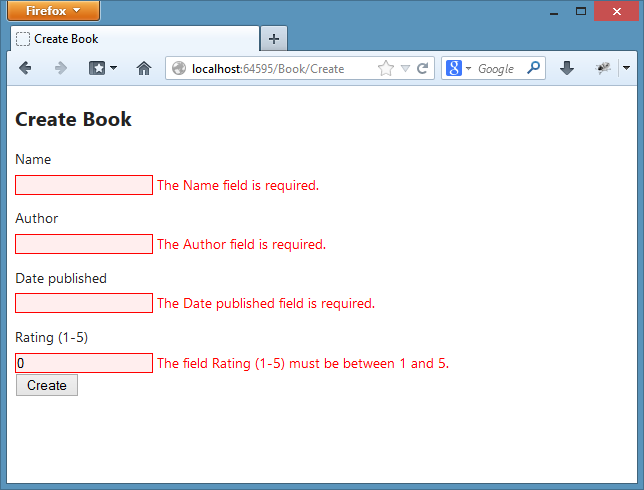
If you now reload the page and submit the form, you’ll notice that instead of a redirect, the validation has kicked in and the appropriate messages have been added:
By correcting the errors, the form will submit and redirect to the Index action.
Summary
Part 1 here has shown you how to bind a View Model to a form in ASP.NET MVC, along with some basic Validation rules being applied. In Part 2, I’ll walk through persisting the data in temporary memory and creating the Edit action.
Leave a Reply